
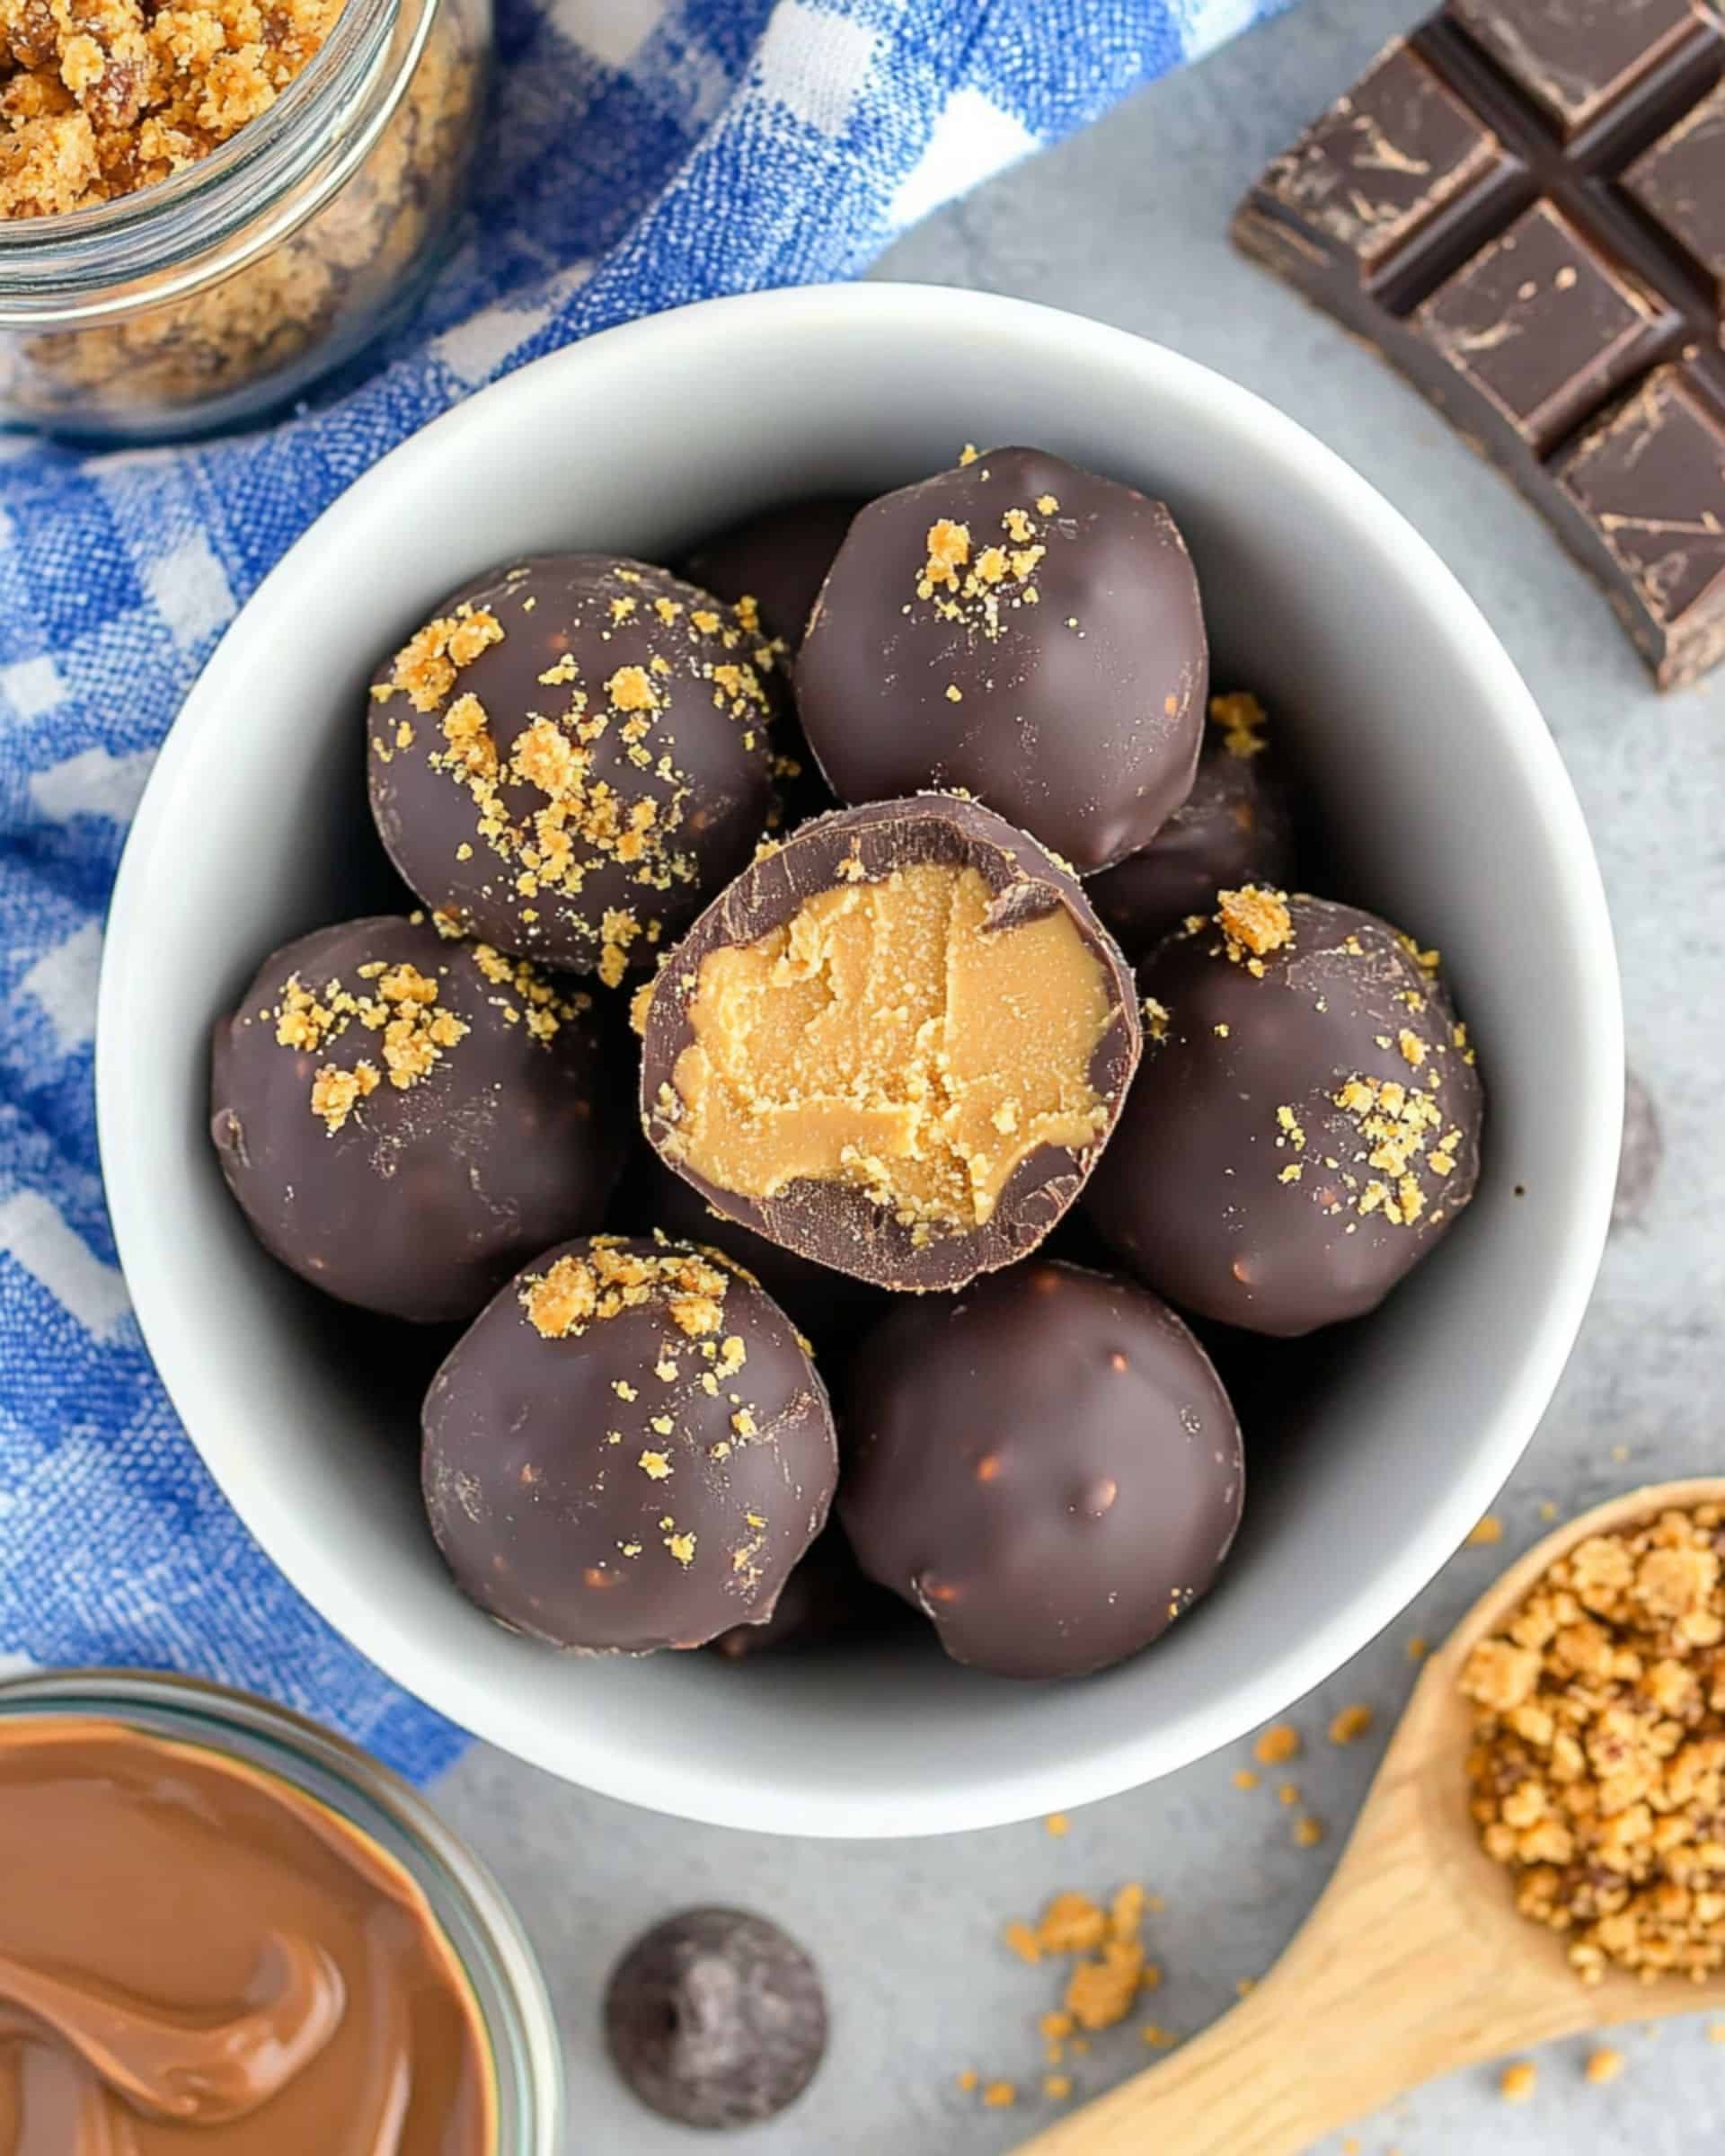
If you love the irresistible combination of peanut butter, chocolate, and crunchy candy, these Butterfinger Balls are about to become your new favorite treat! They’re rich, creamy, and packed with that signature Butterfinger crunch, all wrapped up in a decadent chocolate coating. Plus, they’re easy to make—no baking required!
Why You’ll Love This Recipe
- Easy to Make – No baking required, just mix, chill, and dip!
- Perfect for Gifting – These make a great homemade treat for holidays and special occasions.
- Rich & Crunchy – The combination of peanut butter and crushed Butterfinger bars is truly addictive.
- Freezer-Friendly – Store a batch for when your sweet tooth calls!
Ingredients
For the Peanut Butter Filling:
- Peanut butter – Creates the creamy base. Avoid using natural peanut butter as it doesn’t mix as well.
- Butter – Softened for extra creaminess and structure.
- Vanilla extract – Adds a touch of warmth and depth.
- Powdered sugar – Sweetens and thickens the filling.
- Crushed Butterfinger bars – Adds the signature crunch and flavor.
For the Chocolate Coating:
- Semi-sweet chocolate chips – Melts smoothly for a rich coating.
- Coconut oil or vegetable oil – Helps keep the chocolate silky for easy dipping.
Full ingredient measurements are in the recipe card below!
How to Make Butterfinger Balls
Step 1: Make the Peanut Butter Mixture
- In a mixing bowl, beat together peanut butter, softened butter, and vanilla extract until light and fluffy.
- Gradually add powdered sugar, mixing until fully combined.
- Fold in crushed Butterfinger bars, reserving some for garnish.
Step 2: Shape & Chill
- Scoop out small portions and roll them into balls, placing them on a parchment-lined pan.
- Chill in the refrigerator for 30 minutes to firm up.
Step 3: Melt the Chocolate
- In a microwave-safe bowl, combine chocolate chips and oil.
- Microwave at 50% power for 1 minute, then stir.
- Continue microwaving in 30-second intervals, stirring in between, until fully melted and smooth.
Step 4: Dip & Coat
- Using a fork, dip each chilled peanut butter ball into the melted chocolate, ensuring a full coating.
- Let the excess chocolate drip off before placing back on the parchment-lined pan.
- Sprinkle with reserved crushed Butterfinger bits before the chocolate hardens.
Step 5: Set & Enjoy!
- Allow the chocolate to fully set at room temperature or speed up the process by refrigerating.
- Once set, they’re ready to enjoy!

Pro Tips for Making the Recipe
- Chill the mixture before rolling—it makes shaping the balls much easier.
- Use a fork for dipping to avoid fingerprints and to get a smooth chocolate coating.
- Avoid over-melting the chocolate by microwaving in short intervals.
- Freeze for longer storage—they’ll stay fresh for up to 3 months.
How to Serve
- As a Sweet Snack – Enjoy straight from the fridge!
- Holiday Treats – Perfect for cookie trays and gift boxes.
- Party Dessert – Arrange on a platter for an easy bite-sized treat.
Make Ahead and Storage
Storing Leftovers
- Store in an airtight container in the refrigerator for up to 7 days.
Freezing
- Freeze in a freezer-safe bag or container for up to 3 months.
- Thaw in the fridge before serving.
FAQs
Can I use natural peanut butter?
No, natural peanut butter tends to separate and won’t hold the shape as well.
What’s the best way to crush Butterfingers?
Place them in a ziplock bag and use a rolling pin to crush them into small bits.
Can I use white chocolate instead?
Yes! White chocolate makes a delicious twist on this classic recipe.
How do I prevent the chocolate from cracking?
Make sure the peanut butter balls aren’t too cold before dipping, as drastic temperature changes can cause cracking.
These Butterfinger Balls are the ultimate homemade candy—easy, delicious, and absolutely addictive. Whip up a batch today and watch them disappear in no time!
Print
Butterfinger Balls Recipe
- Prep Time: 1 hour 20 minutes
- Total Time: 1 hour 20 minutes
- Yield: 36 balls 1x
- Category: Dessert, No-Bake Treats
- Method: No-Bake
- Cuisine: American
Description
These Butterfinger Balls are the ultimate no-bake treat with a creamy peanut butter center, crushed Butterfinger pieces, and a rich chocolate coating. They’re sweet, crunchy, and irresistibly delicious—perfect for the holidays, parties, or whenever you need a bite of something amazing!
Ingredients
For the Peanut Butter Filling
- 1 1/2 cups peanut butter (not natural)
- 1/2 cup butter, softened
- 1/2 teaspoon vanilla extract
- 2 cups powdered sugar
- 1 cup crushed Butterfinger bars (reserve some for topping)
For the Chocolate Coating
- 3 cups semi-sweet chocolate chips
- 1 tablespoon coconut oil or vegetable oil
Instructions
- 1. Make the Peanut Butter Mixture
- In a large mixing bowl, beat peanut butter, butter, and vanilla with an electric mixer on medium speed until light and fluffy.
- Gradually add the powdered sugar, mixing on low speed until fully incorporated.
- Stir in the crushed Butterfinger bars, reserving a small amount for topping.
- Chill the mixture in the refrigerator for 30 minutes to make rolling easier.
- 2. Shape the Balls
- Roll the chilled mixture into 1-inch balls and place them on a parchment-lined baking sheet.
- Chill again for 30 minutes to firm up.
- 3. Melt the Chocolate
- In a microwave-safe bowl, combine chocolate chips and coconut oil (or vegetable oil).
- Microwave at 50% power for 1 minute, stir, then continue microwaving in 30-second intervals, stirring each time, until smooth and fully melted.
- 4. Coat the Butterfinger Balls
- Using a fork or dipping tool, dip each peanut butter ball into the melted chocolate, ensuring it is fully coated.
- Tap off excess chocolate and place back on the parchment-lined baking sheet.
- Sprinkle with the reserved crushed Butterfinger bars before the chocolate hardens.
- 5. Let Set & Serve
- Let the chocolate set at room temperature or chill in the refrigerator for 15 minutes until firm.
- Serve and enjoy these rich, crunchy, and chocolatey delights!
Notes
- Storage: Store in an airtight container in the refrigerator for up to 7 days.
- Freezing Option: Freeze in a sealed container for up to 3 months. Thaw in the fridge before serving.
- Peanut Butter Tip: Do not use all-natural peanut butter, as it won’t mix properly with the other ingredients.
- Chocolate Options: You can substitute melting wafers for the chocolate chips for an even smoother coating.
Nutrition
- Serving Size: 1 ball
- Calories: 145kcal
- Sugar: 11g
- Sodium: 55mg
- Fat: 9g
- Saturated Fat: 4g
- Unsaturated Fat: 5g
- Trans Fat: 0g
- Carbohydrates: 14g
- Fiber: 1g
- Protein: 3g
- Cholesterol: 5mg
Your email address will not be published. Required fields are marked *